Manufacturers Specification
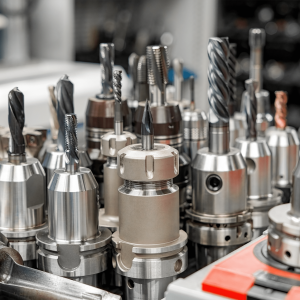
Regular calibration of machining tools is essential for achieving consistent quality in machined parts and maintaining the integrity of manufacturing processes. Our services are available onsite or at our laboratories in Birmingham and Bristol.
Fixtures, Receiver Gauges, Jigs & Profile GaugesTo Top | ||||
| UKAS Calibration for Fixtures/ Receiver Gauges,Jigs & Profile Gauges – Per feature – 400x200x200mm (Subject to drawing evaluation) | UKAS | Add to Quote | ||
MandrelsTo Top | ||||
| Traceable Calibration for Mandrel | Traceable | Add to Quote | ||
| Traceable Calibration for 5 – 35mm Conical Test Mandrel – Sheen 5-35mm | Traceable | Add to Quote | ||
Toolmakers FlatsTo Top | ||||
| Traceable Calibration for Toolmaker’s Flats – To BS869 | Traceable | Add to Quote | ||
Bench CentresTo Top | ||||
| Traceable Calibration for Bench Centres – Up To 300mm (Up to 12″) | Traceable | Add to Quote | ||
| Traceable Calibration for Bench Centres – 450mm – 900mm (18 – 36″) | Traceable | Add to Quote | ||
| Traceable Calibration for Bench Centres – 900mm – 1800mm (36 – 72) | Traceable | Add to Quote | ||
Toolmakers MicroscopeTo Top | ||||
| Traceable Calibration for Toolmaker’s Microscopes | Traceable | Add to Quote | ||
Travelling MicroscopeTo Top | ||||
| Traceable Calibration for Travelling Microscopes – Single Lens – up to 200 mm (up to 8″) | Traceable | Add to Quote | ||
| Traceable Calibration for Cathetometer – up to 600 mm (up to 24″) | Traceable | Add to Quote | ||
Tool PresettersTo Top | ||||
| Traceable Calibration for Tool Presetters | Traceable | Add to Quote | ||
Dividing HeadsTo Top | ||||
| Traceable Calibration for Dividing Heads – Mechanical | Traceable | Add to Quote | ||
| Traceable Calibration for Dividing Heads – Optical | Traceable | Add to Quote | ||
| Traceable Calibration for Dividing Heads – Dual Purpose With Base & Tailstock | Traceable | Add to Quote | ||
Rotary TablesTo Top | ||||
| Traceable Calibration for Rotary Tables – Single Axis – up to 500 mm (up to 20″) | Traceable | Add to Quote | ||
| Traceable Calibration for Rotary Tables – Tilting Axis – up to 20″ (up to 20″) | Traceable | Add to Quote | ||
| Traceable Calibration for Rotary Tables – Single Axis – above 500 mm (above 20″) | Traceable | Add to Quote | ||
| Traceable Calibration for Rotary Tables – Tilting Axis – above 500 mm (above 20″) | Traceable | Add to Quote | ||
| Traceable Calibration for Rotary Tables – 1 Deg Calibration On Rotary Axis | Traceable | Add to Quote | ||
If you haven’t found the calibration you require or need some further assistance with your requirement, contact us using this form and we can find the solution you are looking for.
To ensure we can promptly address your calibration enquiry, please complete the form with all the necessary details. This will help us to provide you with accurate and timely assistance.
For urgent enquiries, please contact us directly via phone at:
All of our Laboratories are accredited to provide UKAS & Traceable calibrations to all the relevant standards giving you peace of mind.
Make consistent, accurate and reliable measurements
Ensure longevity of the measuring instruments
Ensure safety in critical applications such as medical and aerospace
Rhopoint Metrology Ltd Eurolab House, Unit 10 Valepits Road, Garretts Green Industrial Estate, Birmingham, B33 0TD
Rhopoint Metrology Ltd Brunel House, 28 Old Mills Industrial Estate, Paulton, BS39 7SU